How to Create Fleet Management Groups
Fleet Management Groups
A system can only belong to one Fleet Management Group. Fleet Management Group membership cannot change unless you manually move the device from one group to another.
Fleet Management Groups are best suited to keeping your routers updated with common settings (using linked configuration templates) and software. This is done by setting group policies (rules) that define what software and settings that routers in a group can run.
 Initializing Table Of Contents...
Creating Fleet Management Groups
Creating a Fleet Management Group includes these steps:
- Adding and naming the Group
- Adding rules to the Group. You can use rules to apply consistent configurations across devices in your group.
- Heartbeat–Sets the AirVantage check-in status report frequency for all devices in the group
- Install Firmware–Installs the selected operating system firmware version on the selected device model. Create one Install Firmware rule for each device model in the group.
- Apply template–Applies the selected device template on the selected device model. Create one Apply template rule for each device model in the group.
- Apply settings from file–Use a CSV file to configure or update unique values for routers in the group.
- Adding Devices (Systems) to the Group
- Adding users to the Group
To create a new Fleet Management Group:
- Go to Configure > Groups.
Select the type of Group to create: Fleet Management.
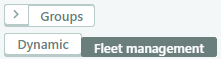
Click Add group…. The New group panel appears.

If required, under Parent, click to select a Parent Group for the new Group.
Enter a Name for the Group.
Click Create (or click Revert to start over).

Now that you’ve created the Group, you can start adding rules.
To add Group rules:
- Select the new group from the main Fleet Management Groups page.
- Click Add rule…
Select one or more rules.
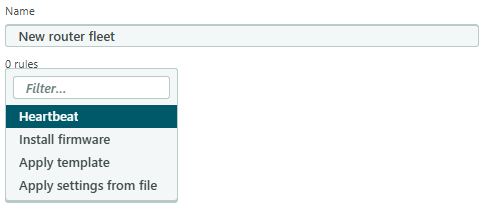
After selecting one instance of each rule, the new group panel will appear as below.
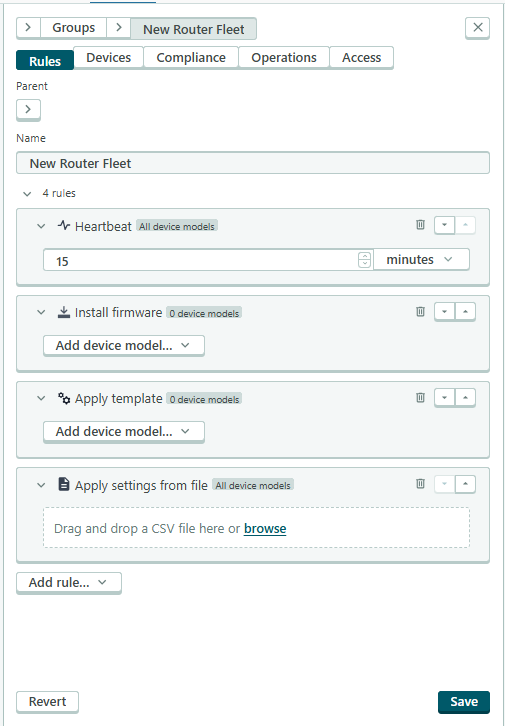
Configure the selected rules. For more information, see Fleet Management Group Rules.
Optional: Click the up/down buttons
 to change the order of the selected rules. When rules are applied (see Applying Rules), they are applied in order, top to bottom.
Click
 to remove a rule.
Click Save.
 to change the order of the selected rules. When rules are applied (see
 to remove a rule.
To add devices to a Group:
- Go to Monitor > Systems.
- Select the systems you want to add.
Click More general & life cycle actions and go to Groups > Add to groups.
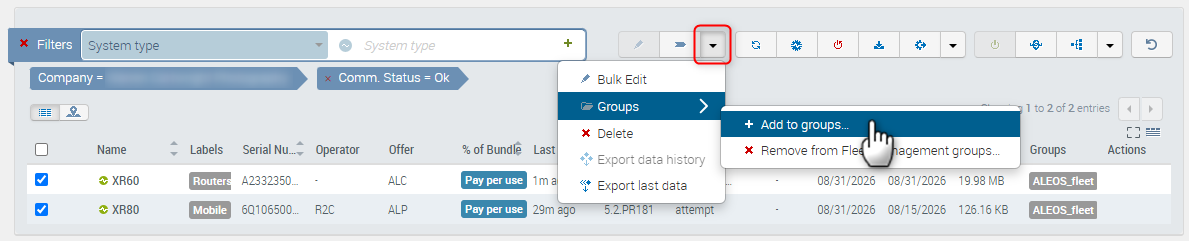
In the Systems > Add Group panel, click Fleet management.
Select the desired Group.
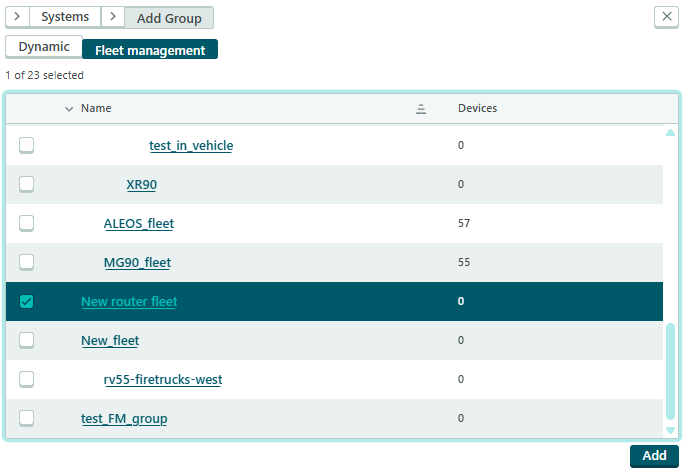
Click Add.
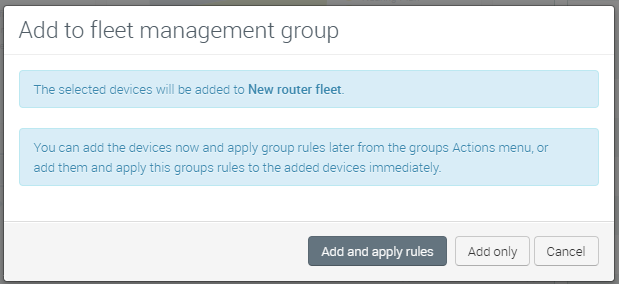
On the confirmation message, select an option:
- Add and apply rules–adds the devices and applies the rules immediately (update the device firmware, for example)
- Add only–adds the devices without applying rules
- Cancel–return to the group selection panel
Creating a Child Group
The number of parent/child group levels is limited to 10. For example:
- Parent (level 1)
- Child/Parent 1 (level 2)
- Child/Parent 1.1 (level 3)
- Child/Parent 1.1.1 (level 4)
- Child/Parent 1.1.1.1 (level 5)
- Child/Parent 1.1.1.1.1 (level 6)
- Child/Parent 1.1.1.1.1.1 (level 7)
- Child/Parent 1.1.1.1.1.1.1 (level 8)
- Child/Parent 1.1.1.1.1.1.1.1 (level 9)
- Child 1.1.1.1.1.1.1.1.1 (level 10)
Child Fleet Management Groups are empty when created, and you must manually add rules and devices to them.
To create a Child Group:
- Go to Configure > Groups.
- Select the type of Group to create: Fleet Management.
In the desired Parent Group’s Name column, click Add.

The New group panel appears, showing you the parent Group.
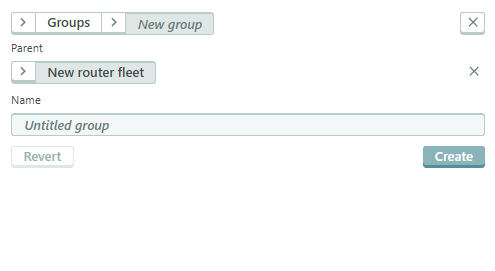
Add a name for the new child Group, and configure it as described in Creating Fleet Management Groups above.

Fleet Management Group Rules
Heartbeat
The Heartbeat rule sets how often the router checks in to AirVantage and sends its default status report.
The default setting is 15 minutes. This is also the minimum setting, but you can set the Heartbeat to longer periods in units of minutes, hours, days and weeks.
This rule is applied to every device in the group.

Install firmware
Applying the Install firmware rule updates routers with a selected firmware release.
Each router model in the group needs to be added to the Install firmware rule.
To configure the Install firmware rule:
Click Add device model….
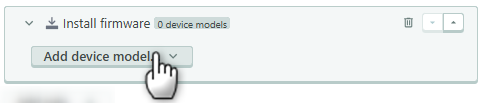
Select the desired AirLink router model.
Click Select a firmware…
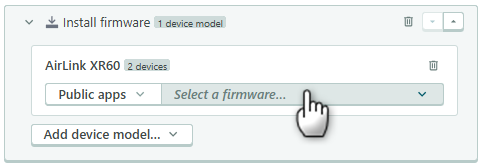
Select the desired firmware version.
If you have other router models in the Group for which you want to install firmware, return to step 1.
Click Save.
When upgrading firmware, a device may require intermediate firmware version before it can be upgraded to the specified version.
For example, upgrading a device running AirLink OS 2.1.28 to 6.1.0.37 requires the device to upgrade to AirLink OS 4.0.x first.
The Apply Group Rules operation does not automatically upgrade the firmware according to the required upgrade path. The operation can fail with an error message that notes the firmware upgrade order.
For more information about firmware upgrades, see How to upgrade firmware on gateways and routers?.
Apply template
Applying the Apply template rule updates routers with a selected device template. For more information, see How to create and apply a template.
Each router model in the group needs to be added to the Apply template rule.
To configure the Apply template rule:
Click Add device model….
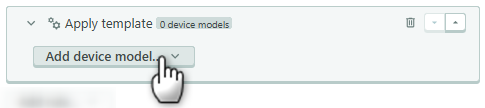
Select the desired AirLink router model.
Click Select a template…
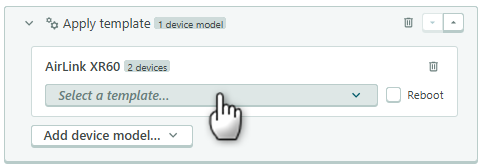
Select the desired template.
If you have other router models in the Group to which you want to apply templates, return to step 1.
Click Save.
Ensure that the templates that you select are compatible with any Install firmware rules selected. The device names and firmware versions in the firmware names and the template names should match.
Apply settings from file
The Apply settings from file rule updates unique values for individual routers using a selected CSV file. For more information, see How to change settings on multiple devices (Change configuration).
To configure the Apply settings from file rule:
- Add a CSV configuration file. You can drag and drop a file, or click browse to locate and add a file.
Pick the device’s identifier: “UID” (default) or “Serial number”. This should match how each device is identified in the CSV file.
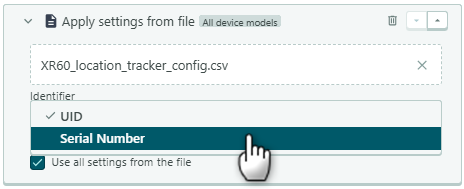
(Optional) Select which settings to apply from the CSV file. By default, Use all settings from the file is enabled. You can disable this setting and then select specific CSV settings you want to apply.
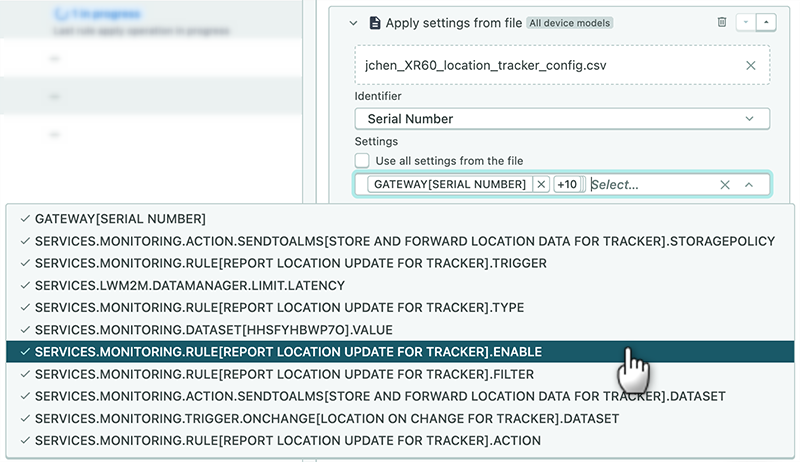
Click Save.
After saving the rule, you can download the CSV file to view it offline.
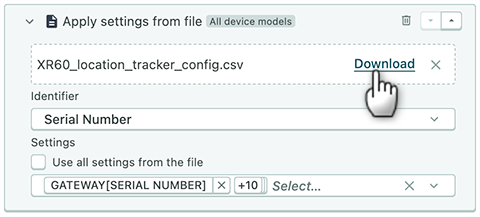
After applying the “Apply settings from file” rule, the Group’s operations page includes an “Apply setting (CSV)” operation. The standard operation details appear, displaying the selected settings.

Check Compliance
Under the Compliance tab, you can check which devices are complying with the Group rules. For example, the Compliance tab indicates which devices are not running the selected firmware version or have not had the selected template applied.

Devices’ compliance status is not automatically reported when you add devices to a Group.
Click Check Compliance to generate device compliance status for a Group.

The compliance results are also summarized in the main Groups table, in the Rule compliance column.

If any devices are not compliant, you can:
- change the Group rules. When you save the change, you can apply the updated rules to the devices
- apply the Group rules to bring the device into compliance. See Applying Group Rules below.
Compliance checks are not automatically triggered after you apply Group rules. After applying the Group rules, click Check Compliance to refresh device compliance status for a Group.
Applying Group Rules
To apply Group rules:
- Select the Group in the main Groups table.
- Click Actions > Apply group rules.
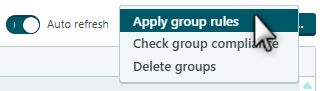
In the Groups panel that appears, select the rules to apply. You do not need to apply all the Group rules.
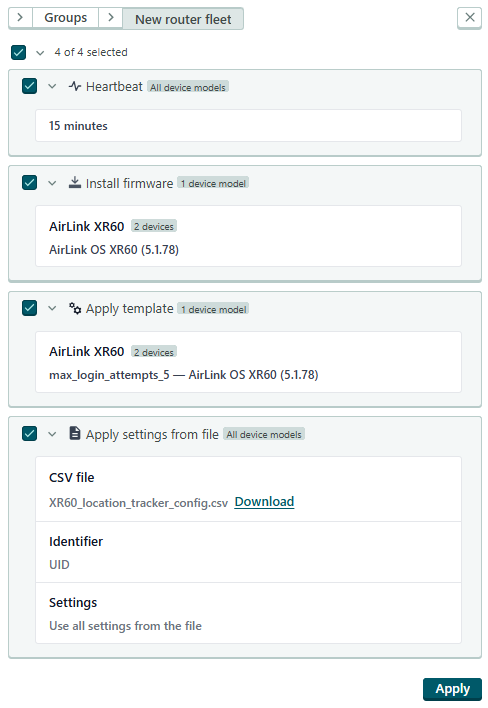
Click Apply.
- You can apply rules to only one Group at a time.
- Rules are applied in order, top to bottom. In the example above, the device will receive a firmware update, then have a template applied.
- Firmware rules may fail to apply because the devices are running much older firmware versions that require an interim upgrade before upgrading to the target version.
- A template application may fail because the template is not compatible with the firmware version running on the device. Ensure that your Install firmware and Apply template rules are using the same firmware version.
- Operations may fail if the device does not check in within the timeout threshold.
- Apply group rules will trigger operations for devices that appear to already comply with group rules. This ensures that group rules are applied to devices that have not had their compliance checked recently and whose configurations are out of date, despite appearing compliant.
- After applying the Group rules, click Check Compliance to refresh device compliance status for a Group. If a device is still not compliant, check the device’s operation details for any failed operations.
Operations
The Apply Operations column shows the status for the last completed Apply group rules operation.
The column shows the number of operations:
- completed, with the time that the latest Apply group rules operation finished (“2 hours ago”, for example)
- in progress or pending

Viewing Operation Details
Under the Operations tab, you can view the operations triggered by Apply group rules.
To view operation details:
- Click a Group name to view the desired Group.
Click the Operations tab.
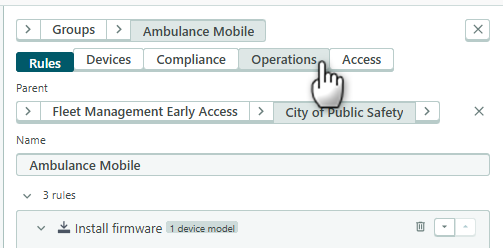
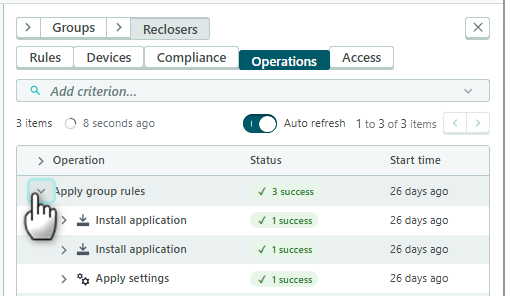
Expand a rule operation to see the individual tasks within that operation.
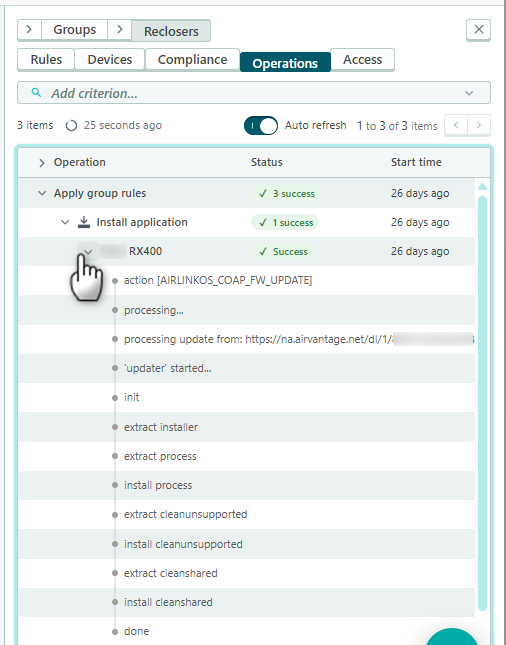
Expand a task to view event messages for that task.
Click Auto refresh to enable refreshing the list every 30 seconds.
Filter the operations
Under the Operations tab, you can add filters to find specific operations information.
You can filter operations by:
- Final status–operation status: Success or Failed
- Launched by–the user who created the operation
- System–individual system name
Click Add criterion… to add a filter.
Click the expand button  to add more filters.
Click View details  in the Actions column to open the Operation details.

In the main Fleet management groups table, in the Apply operations column, you can click a status to view a group’s Apply group rules Operations filtered by the matching status.
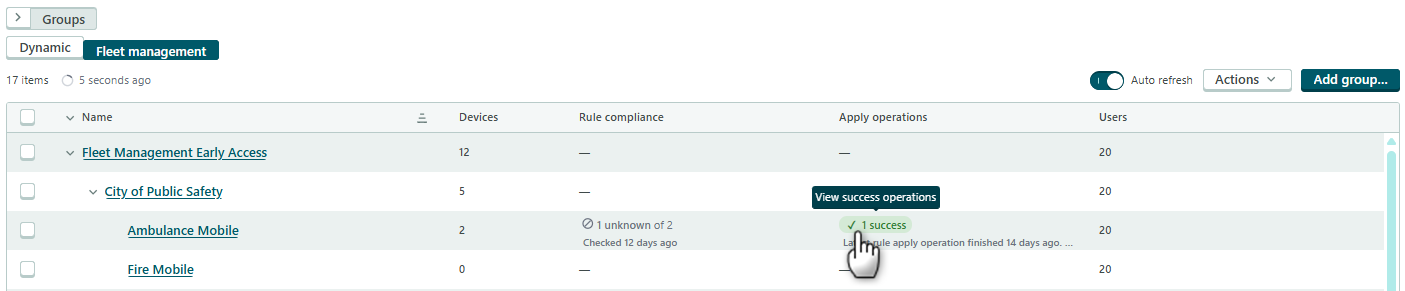
View Operations for a Single System
To view operations for a single system:
- Click a Group name to view the desired Group.
Click the Compliance tab.
The Apply Operations column summarizes the operations for the most recent Apply group rules execution.
You may have to expand the Compliance window to full width to view the Apply Operations column.
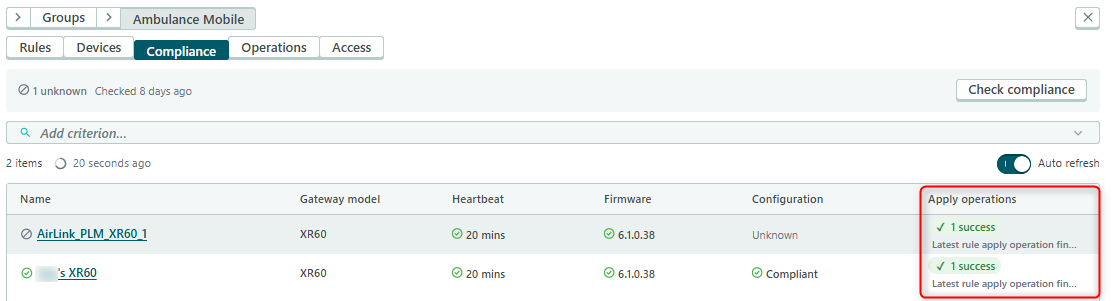
Click a device name.
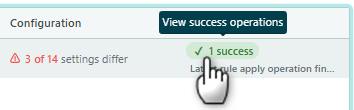
You can also click a status in the Apply operations column to view the Apply group rules Operations filtered by the matching status.
In the next window, click the Operations tab to list the operations that affect that device.
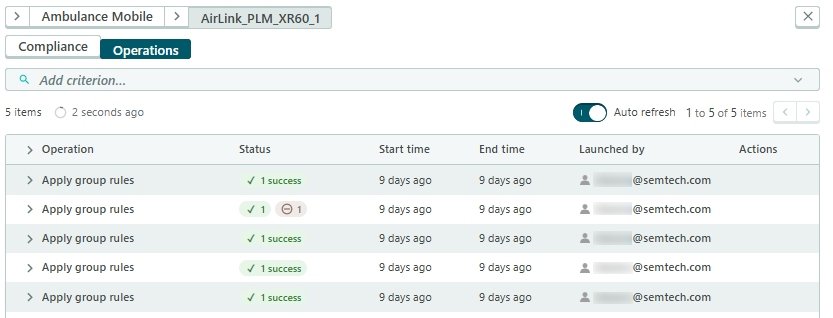
If desired, filter the operations by State, Final status, and Launched by.
Cancel (Abort) or Retry Operations
To cancel a pending operation:
- Click a Group name to view the desired Group.
- Click the Operations tab.
- Click > to expand the desired Apply groups rules operation.
In the Actions column, click Abort
 . Only operations in the Initializing, Scheduled or In Progress states can be aborted.
You may have to expand the Operations window to full width to view the Actions column.
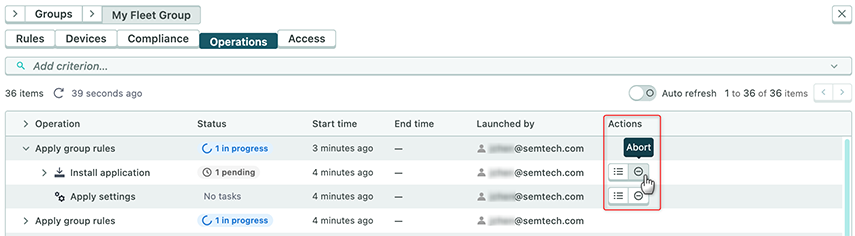
Confirm the cancellation.
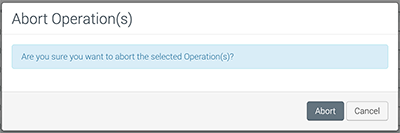
 . Only operations in the Initializing, Scheduled or In Progress states can be aborted.
When the table refreshes, the status changes to Cancelled.
To retry a failed operation:
- Click a Group name to view the desired Group.
- Click the Operations tab.
- Click > to expand the desired Apply groups rules operation.
In the Actions column for the failed operation, click Retry
 .
You may have to expand the Operations window to full width to view the Actions column.
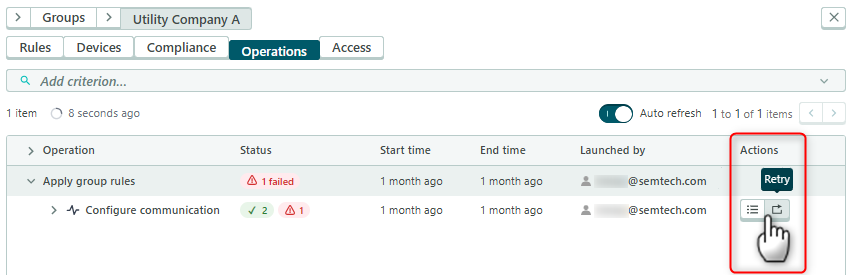
Confirm the action.
 .
A new Apply group rules operation is created for only that rule operation.
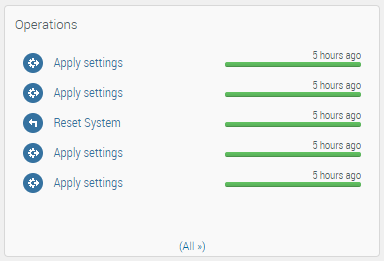
You can also use the Operations widget under Monitor > Systems to cancel and retry operations. Click an operation in the widget to view the operation details, and then click Abort
or Retry
.
See How to use Operations for more information.
 or Retry
 .
