 Searching...
How to Create Dynamic Groups
Dynamic Groups
In Dynamic Groups, you can create Groups to organize your fleet by attributes such as label, gateway model, firmware version, or any combination of these.
In Dynamic Groups, a system can belong to more than one Group. For example, if you have a fleet of AirLink XR90 routers with the label “California” that are running firmware version 5.3.66, you can create one Group for all systems with the label “California” (to organize systems by geography) and another Group for all XR90 routers running firmware version 5.3.66 (to identify systems running the current firmware release*).
Creating Dynamic Groups
You can have a maximum of 100 Dynamic Groups in your account. This amount includes both parent and child Groups.
About Top-Level Groups
Before you begin creating new Groups, please be aware of how Groups hierarchies function. Most notably, top-level Groups cannot be modified by users other than the system administrator. Only the system administrator can change top-level Group definitions.
Top-level Groups do not have a parent Group and are read-only for users. If a child Group has a parent Group that a user does not have access to, then that child Group appears to be a top-level Group from that user’s perspective. This type of top-level Group cannot be modified by a user, even if they have the correct access rights.
As a system administrator, this behavior lets you control the systems that users can access and potentially modify. For example, users with Groups read/write access cannot modify a filter in a top-level Group to add systems that they should not have access to. Users with read/write access can only create child Groups, and these child Groups can only include the systems that are in the parent Group.

To create a new Dynamic Group:
- Go to Configure > Groups.
Select the type of Group to create: Dynamic.
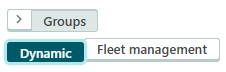
Click Add Group. The New group panel appears.

If required, under Parent, click to select a Parent Group for the new Group.
Enter a Name for the Group.
Under Filter, click to select an attribute that will define the Group. See Filter Criteria below.

Click to select or enter some data for the attribute. Selecting an attribute will automatically update the system preview panel.
For example, if you have selected Label, select the desired label. Any systems with that label will be added to the group. Based on the results you get, adjust the filter’s definition and logic to find the systems you want in the new Group.

Click Add criterion and repeat steps 5 and 6 to create multiple filters, if required.
Click Create. The systems are added to the new Group, based on the filters you have defined.
If any system attributes change (if a system’s label is deleted, or its firmware revision changes), the Group is updated automatically.


Creating a Child Group
The number of parent/child group levels is limited to 10. For example:
- Parent (level 1)
- Child/Parent 1 (level 2)
- Child/Parent 1.1 (level 3)
- Child/Parent 1.1.1 (level 4)
- Child/Parent 1.1.1.1 (level 5)
- Child/Parent 1.1.1.1.1 (level 6)
- Child/Parent 1.1.1.1.1.1 (level 7)
- Child/Parent 1.1.1.1.1.1.1 (level 8)
- Child/Parent 1.1.1.1.1.1.1.1 (level 9)
- Child 1.1.1.1.1.1.1.1.1 (level 10)
In Dynamic Groups, child Groups inherit systems from their parent Group. As a non-administrator Groups user, you can add a child Group that will only narrow the group of systems, not expand it.
To create a Child Group:
- Go to Configure > Groups.
In the desired Parent Group’s Name column, click Add.

The New group panel appears, showing you the parent Group and the parent Group filters.

Add filters to the new child Group, as described in “To create a new Group” above.
Click Create.


Filter Criteria
Label
- You can create a Group that contains systems that have the same label(s).
- The labels must already be applied to the systems. To apply labels to your systems, see Configure and How To Update Systems to Add Unique Labels.
- You include only one Label filter per Group, but you can add multiple labels to a single filter.
To refine your results for systems that have multiple labels, choose a condition:
- “include any” (the system has ONE OR MORE selected labels)
- “include all” (the system has ALL selected labels)


Gateway model
You can create a Group that contains systems containing all routers (gateways) of the same model (all AirLink XR90 routers, for example).
In a child Group, the selected gateway models cannot be different from the models defined by the parent Group’s filter. Otherwise the error “A group cannot contain different gateway models from its parent groups” appears.
Enter the exact, case-sensitive model name for which you want to create a Group. For example: XR90, XR80, XR60, RX55, RV55, MP70, LX60, LX40.
To include or exclude certain models, choose the conditions “is” or “is not”. For example, use “is not” RX55 to select all models except the 4G model.


Firmware revision
- You can create a Group that contains systems running identical firmware revisions. This is a useful way to track routers at the same firmware revision before beginning an upgrade, similar to how you would use the Upgrade Status widget. As each router is upgraded, the Group will update itself, and when the Group is empty, you will know that the upgrade campaign is complete.
- Enter the firmware revision for which you want to create a Group. For example, 4.18.1 for ALEOS-powered routers or 5.3.66 for AirLink OS-powered routers.
To include or exclude specific firmware revisions, choose conditions “is” or “is not”. This is useful for identifying routers that have not been upgraded to the latest firmware. For example, create a Group with firmware revision “is not” the latest version to track upgrade progress. The Group empties as routers upgrade.


You can also select combinations of attributes. For example, selecting Gateway model XR90 AND Label “California” AND Firmware revision “5.3.66” would allow you to add all XR90 routers with the label “California” that are running firmware revision 5.3.66.
Filter Troubleshooting
If, after entering a filter, you get:
too many systems: add more filters.
too few systems: remove filters or change “include all” to “include any”
no devices: Check your spelling (maybe there’s a typo in your label) and format (firmware revisions must be exact; for example, 4.18.1 for ALEOS-powered routers or 5.3.66 for AirLink OS-powered routers. Entering 5.3 won’t get any results).
Filters do not always have to generate results. Empty Groups are permitted. You can create empty groups using a future firmware revision, or gateway model that you’re expecting to add to your fleet.
Add Users to a Group
Administrators and users with “Groups Write” permission can add users to a Group. You can add users from your company and any partnered companies. The process of adding users also includes adding profiles to those users to control who can view or edit the Group, and control what users can do to the systems within the Group.
Before starting, confirm that your users exist (see Administration > Users) and that the profiles for those users are configured (see Administration > Profiles). For more information, see Administration and Managing Profiles.
To add users to a Group:
When editing a Group, click Access.

In the Access tab, click Add users….

In the Add users panel, under Company, select the company from which you want to add users. Click Filter… to search for a specific partnered company.

Under Users, select one or more users. Click Select users… to search for a specific user.

To select more users from a different company, return to Step 3.
Under Profiles, select one or more profiles that will control what the users can do within that Group. For example, Groups Read or Groups Read/Write. In this example, you could also select Configuration Management so that the users can configure systems in that Group.
Common profile combinations:
- “Groups Read” + “Systems View” for view-only users
- “Groups Read/Write” + “Systems View” + “Operations” for full management

Click Add.
Verify that the users now appear in the Access tab with assigned profiles.


The next time those users log in, they will be able to view only the Groups to which they have access and be able to take actions according to their assigned rights.
Users require both Groups Read and Write access to view Groups and modify them.
User access can be affected by whether a Group is a parent or child Group.
Users added to a Group will have access to that Group’s child Groups using the same profiles they were assigned in the parent Group. You can add additional profiles for a user in the child Group. However, if a user wants to modify a child Group’s definition, then they must have Group Write permission in the immediate parent Group.
Deleting Users
To delete a user:
When editing a group, click Access.
In the Access tab, under Actions, click
 .

Click Confirm. The user loses access immediately.
 .

You cannot delete a user or remove a profile from the user if that user or profile exists in a parent Group. If a user has access via a parent Group, remove them from the parent Group instead.
Edit Groups
To edit Groups, you must have Groups Read/Write access, AND the Group cannot be a top-level Group. Top-level Groups can be edited only by System administrators.
To edit an existing group:
- Go to Configure > Groups.
- Click the desired Dynamic group. The group details appear.
If you have the required group access rights, you can edit the following options:
- Edit the group Name
- Edit or add a Filter
If you have the required group access rights, you can edit the Group users.
Click Save or click Revert to cancel any changes.
Changing filters immediately affects Group membership. Systems are removed from the Group automatically if they no longer match filter criteria.